Showing posts with label Sewing. Show all posts

Determine the right needle for a sewing thread

Determine the right needle for a sewing thread

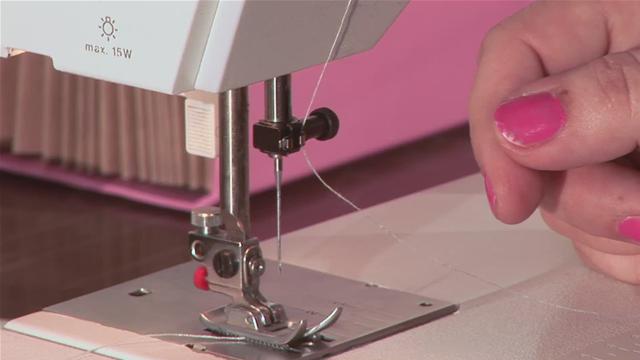
Here’s a quick way to determine if the thread and the sewing machine needle are compatible:

Take half a metre of the thread being used on the machine and thread it through the eye of a loose needle Hold the thread vertically with the needle at the top  
  • If the needle is too big, it will drop to the bottom of the thread
  • If the needle is too small, it will stick at the top of the thread
  • If the needle is the right size, it will slowly spiral to the bottom of the thread 
However, a larger-than-normal needle may have to be used to penetrate thicker fabric, or stitch over the top of pronounced or bulky seams.


Common problem & solution:

Sewing machine needles can break during sewing and some of the common reasons for breakage are mentioned below, along with the possible solutions:


Needle check list:

Inserting a New Needle

·         Always ensure the needle is the correct needle system for the sewing machine
·         Make sure the needle size / eye fits the thread size being used
·         Make sure the needle is pushed all the way into the needle holder
·         Ensure that the angle of the needle is correct
·         After inserting a needle in the machine turn the machine hand wheel manually to make sure the needle isn't contacting any parts

Checking a needle that is already in a machine:

·         Is the needle inserted correctly?
·         Is the needle contacting any machine parts?
·         Is the needle bent?
·         Is the eye rough or blocked with melted fibre?
·         Is the point damaged?

·         When in doubt change the needle!


SEWING MACHINE which are used in Garments Industries # 01

SEWING MACHINE which are used in Garments Industries # 01
Sewing is a creative and interesting skill. The knowledge of sewing give a confident feeling when it is applied to the construction of garments. The earlier method of sewing by hand is not applicable for all stages of garment making. Therefore, considerable emphasis is given to machine sewing. There are several machines in the market today, each with its own desirable features and advantages. Sewing machines range from most basic having only simple lock stitch to the electronic machines that use advanced computer technology having various functions for

Example : piping, binding, ruffling, pleating, darning, hemming and even making buttonholes and attaching fasteners. A good sewing machine is required to obtain quality products. One has to be familiar with the characteristics of different types of machines for selecting appropriate machine, depending upon the ability and requirements of the person. 

1.1 TYPES OF SEWING MACHINES:
Sewing machines are now available in various models such as domestic model, tailor model, industrial model, portable and cabinet models. They may be operated by hand, treadle or electric motor.

Hand – Operated Sewing Machine:

This is the simplest form of sewing machine which is operated by hand. A detachable handle provided to the flywheel is used to operate the machine. This machine is generally suitable for domestic purpose because it does not help in speeding up the work.

Treadle Sewing Machine:

This machine is exactly like the hand sewing machine but it is operated by foot using an additional stand. In this type the balance wheel is operated by a belt with the help of lower stand, which is driven by feet. This machine operates faster than that of the hand-operated machine. This machine is suitable where there is no power supply. When handling this machine both the hands are free to handle the fabric, speeding up the work. Even some of the heavy-duty machines are operated by this method.

Electric Sewing Machine:

This is the fastest sewing machine. One needs practice to handle it. In an electric machine the balance wheel comes to motion by a belt, which is attached to an electric motor.

1.2 PARTS OF A SEWING MACHINE AND THEIR FUNCTIONS:

The basic structure of sewing machine is the same whether it is hand-operated sewing, treadle sewing machine or electric sewing machine. The basic parts of a sewing are listed below and seen in Fig.1
                   Fig. 1 Parts of a Sewing Machine

1. Spool pin: It is fitted on top of the arm to hold the reel.

2. Thread guide: It holds the thread in position from the spool to the needle.

3. Tension disc: The two concave discs put together with the convex sides facing each other. The thread passes between the two. The tension of the thread is adjusted by a spring and nut which increases or decreases pressure

4. Take up lever: It is a lever fitted to the body of the arm. Its up and down motion feeds the thread to the needle and tightens the loop formed by the shuttle.

5. Needle bar: This is a steel rod to hold the needle at one end with the help of a clamp. Its main function is to give motion to the needle.

6. Bobbin case: This moves into position to catch the top thread and form the stitch as the needle is lowered into the bobbin chamber.

7. Presser foot: It is fixed to the presser bar to hold the cloth firmly in position when lowered.

8. Presser foot lifter: A lever attached to the presser bar for raising and lowering the presser foot.

9. Stitch regulator: This controls the length of the stitch.

10. Bobbin winder: A simple mechanism used for winding threadon the bobbin.

11. Fly Wheel: When this is made to revolve, it works the mechanism of the motion

12. Clutch or Thumb Screw: This is in the center of the fly wheel and it engages and disengages the stitching mechanism.

13. Slide Plate: A rectangular plate, which facilitates the removal of the bobbin case without lifting the machine.

14. Needle Plate or Throat Plate: A semi-circular disc with a hole to allow the needle to pass through it.

15. Feed dog: This consists of a set of teeth fitted below the needle plate. It helps to move the cloth forward while sewing.

16. Face plate: A cover which on removal gives access to the oiling points on the needle bar, presser bar and take-up lever.

17. Spool pin for bobbin winding: Spool of thread is placed on this at the time of bobbin winding.


Reference :
Book Name : GARMENT MAKING
Editor
Miss. P. M. Geetha
M. Sc., (Textiles & Clothing)
Head of the Department of Garment Technology
Kamala Nehru Polytechnic for Women, Hyderabad

Waste Reduction Techniques For An Garments Industries?

Waste Reduction Techniques For An Garments Industries?
Waste Reduction Techniques :
Some of the waste reduction tools include zero defects, setup time reduction, and line balancing. The goal of zero defects is to ensure that products are fault free all the way, through continuous improvement of the manufacturing process (Karlsson and Ahlstrom 1996). Human beings almost invariably will make errors. When errors are made and are not caught then defective parts will appear at the end of the process. However, if the errors can be prevented before they happen then defective parts can be avoided. One of the tools that the zero defect principle uses is Poka Yoke. Poka-Yoke, which was developed by Shingo, is an autonomous defect control system that is put on a machine that inspects all parts to make sure that there are zero defects. The goal of Poka-Yoke is to observe the defective parts at the source, detect the cause of the defect, and to avoid moving the defective part to the next workstation (Feld, 2000).

Single Minute Exchange of Die (SMED) is another technique of waste reduction.During 1950’s Ohno devised this system; and was able to reduce the die changing time from 1 day to three minutes (Womack, Jones and Ross, 1990). The basic idea of SMED is to reduce the setup time on a machine. There are two types of setups: internal and external. Internal setup activities are those that can be carried out only when the machine is stopped while external setup activities are those that can be done during machining. The idea is to move as many activities as possible from internal to external (Feld, 2000). Once all activities are identified than the next step is to try to simplify these activities (e.g. standardize setup, use fewer bolts). By reducing the setup time many benefits can be realized. First, die-changing specialists are not needed. Second, inventory can be reduced by producing small batches and more variety of product mix can be run.

Line balancing is considered a great weapon against waste, especially the wasted time of workers. The idea is to make every workstation produce the right volume of work that is sent to upstream workstations without any stoppage (Mid-America Manufacturing Technology Center Press Release, 2000). This will guarantee that each workstation is working in a synchronized manner, neither faster nor slower than other workstations.

Work Standardization: 
A very important principle of waste reduction is the standardization of work. Standardized work basically ensures that each job is organized and carried out in the same manner; irrespective of the people working on it. In this way if the work is standardized the same quality output will be received even if the worker is changed in process. At Toyota, every worker follows the same processing steps all the time. This includes the time needed to finish a job, the order of steps to follow for each job, and the parts on hand. By doing this one ensures that line balancing is achieved, unwanted work in process inventory is minimized and non value added activities are reduced. A tool that is used to standardize work is called takt time.

Value Stream mapping: 
Value Stream Mapping (VSM) is a technique that was originally developed by Toyota and then popularized by the book, Learning to See (The Lean Enterprise Institute, 1998), by Rother and Shook. VSM is used to find waste in the value stream of a product. Once waste is identified, then it is easier to make plan to eliminate it. The purpose of VSM is process improvement at the system level. Value stream maps show the process in a normal flow format. However, in addition to the information normally found on a process flow diagram, value stream maps show the information flow necessary to plan and meet the customer’s normal demands. Other process information includes cycle times, inventories, changeover times, staffing and modes of transportation etc. VSMs can be made for the entire business process or part of it depending upon necessity. The key benefit to value stream mapping is that it focuses on the entire value stream to find system wastes and try to eliminate the pitfall (Wilson, 2009, p. 147-153). Generally, the value stream maps are of three types. Present State Value Stream Map (PSVSM) tells about the current situation, Future State Value Stream Map (FSVSM) can be obtained by removing wastes (which can be eliminated in the short time like three to six months) from PSVSM and Ideal State Value Stream Mapping (ISVSM) is obtained by removing all the wastes from the stream. The VSM is designed to be a tool for highlighting activities. In lean terminology they are called kaizen activities, for waste reduction. Once the wastes are highlighted, the purpose of a VSM is to communicate the opportunities so they may be prioritized and acted upon. Hence, the prioritization and action must follow the VSM, otherwise it is just a waste like other wastes.

How to design at garments Sewing Station & Seating Arrangement?

How to design at garments Sewing Station & Seating Arrangement?
Employees encounter several risk factors at sewing workstations, such as awkward arm, neck, trunk, and leg postures. These postures are influenced by the size of the worker and the design of the workstation. This section explains potential hazards encountered at the workstation and a general description of a proper workstation design.

  • Chair
  •  Table
  •  Treadle/Pedal
1. Chair:

Potential Hazards: 
Workers often maintain awkward shoulder, elbow, and wrist postures (Fig. 1) while sewing because of improper chair height or position.
Employees must sit or stand for long periods in the same position, resulting in soreness of the back and neck, and/or buttocks, and reduced circulation to the legs.

Possible Solutions:
Use easily adjustable chairs (Fig. 2) to minimize awkward postures, and provide training on how to properly use them.

1. Chairs should have:
  • Easily adjustable height, seat tilt, and backrest position;
  • Padded back rest with rounded edges that supports worker's lower back;
  • No wheels, or wheels that lock;
  • A gently sloped or "waterfall" front edge to help prevent the chair's edge from pressing into the back of the legs; and
  • A cushioned/contoured seat, which distributes the worker's weight so no body part gets all the pressure.

To choose a proper chair, consider the amount of movement the task requires, and the size of the worker. For tasks that require a lot of twisting, Fig. 2 is desirable.
  • Chairs should be placed at an appropriate distance from the workstation, so workers can perform tasks without pulling their elbows away from the body (Fig. 3).
  • Motor placement should not interfere with proper chair distance.
  • Chair height is correct when the work surface is at elbow height. Ideally, in this posture, the entire sole of the foot should rest on the floor, and the back of the knee should be slightly higher than the seat of the chair (Fig. 4). (This illustrates the importance of also having an adjustable table.) The seat may be slightly lower when the worker uses a treadle or pedal.